
This task will take some time, but the result is worth it! You’ll get your own Windows bootable USB flash drive using only the system utilities and archiver manually!
Table of Contents
TogglePrerequisites
Distribution
To get started you need to have one of Windows distributions: Windows Installation dvd or Windows ISO file
If you currently do not have any of them, don’t worry, it’s extremely simple to get Windows ISO from Microsoft website! Let me show, where you can download it.
Archiver or Imaging Tool(only for ISO, if you have DVD go to point three)
For completing the task, you will need copy all distribution content to USB drive, so if you have a Windows ISO file, you will also need Archiver, like 7z or your regular archiver. Alternatively you can use disk imaging tool, like “DAEMON Tools” to mount ISO and use it as usual physical drive. I prefer simple, lightweight and free archiver 7-zip, that you can download here.
USB flash drive with at least 4 GB of free space
You will not have to format it, so it can contain some data, that will not be lost. Only one mandatory requirement is enough free space for placing unpacked distribution on your thumb drive.
Maybe leave creating bootable USB for WinUSB?;)
First step – place Windows files on USB drive
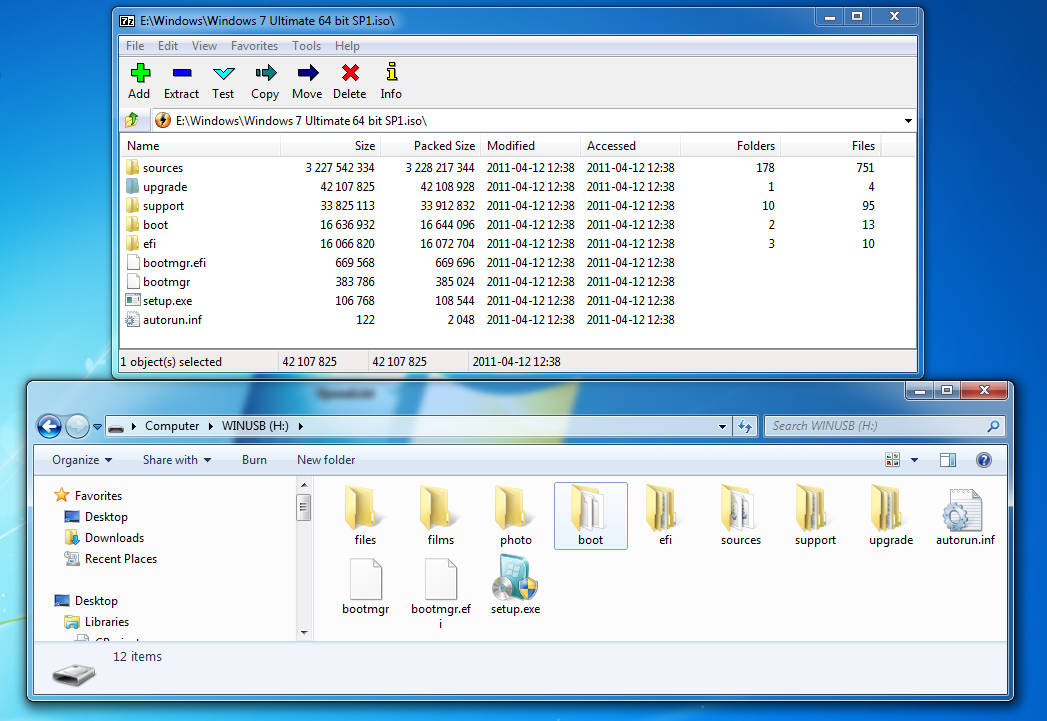
1. Plug the USB flash drive you want to make a bootable. For example, I use flash drive named WINUSB.
I’ve some important files on it:
2. Copy from DVD or unpack from ISO all content of Windows distribution that you have to pen drive. I use 7-zip for unpacking, and you can use any file archiver for you chose.
Ok, files copied.
After the files have been placed, let’s make your flash drive bootable!
Second step – Make your Windows USB drive bootable
1. Make the main partition of USB stick active that mark it as bootable.
We solve this task using simple Microsoft tool for manage disks, partitions or volumes -Diskpart. For launch Diskpart you have to click “Start” menu button and type “diskpart” in “Search programs and files” line than double click on diskpart.exe program.
List disk
After Diskpart started, type “list disk” command and click “Enter”. You see list of physical disks mounted to your PC. Choose your flash drive, you can find it by size.
Select disk [ your disk index ]
Type “select disk [ your disk index ]” in command line and click “Enter”. It will point diskpart that you work with selected disk. In my case index equals 1.
Select partition 1
Type “select partition 1” in command line and click “Enter”. It will point diskpart that you work with first partition of disk.
Active
Type “active” and click “Enter” that marks partition as available to boot.
Exit
Now when drive marked as bootable, type “exit” and click “Enter” that will close Diskpart.
Last step – Set master boot code of USB drive partition to BOOTMGR.
Master boot code(MBC) is the “program” that allows start Windows installation from your pen drive. For writing boot code to boot sector of your drive, you have to use one more Microsoft tool, named Bootsect, you can find it in distribution files that you have already unpacked or copied to flash drive.
Bootsect is now placed in the folder below:
[You flash drive]\boot\bootsect.exe
1. “[drive letter]:”
This command moves the command prompt to you USB stick.
2. “cd \boot”
Moves the command prompt pointer to boot directory where bootsect.exe is located.
3. “bootsect /nt60 [drive letter]: /mbr”
Makes Master Boot Record and Masted Boot Code of you pen drive to be able to run Windows installation.
Congratulations! Now you have you own bootable windows install usb flash drive!
That’s it. It has been nice to work with you =)