Many users have to reinstall Windows due to various system errors and failures quite often. For example, you bought a small laptop without DVD-ROM for your sister, and a year later she asked you to reinstall Windows 10 becouse it picked up the virus, same time, you have long planned to reinstall the system on your parents’ PC, but could not find a time for this task…

And you come to the idea that it would be great to have a set of distributives on one bootable USB drive, Windows 7 for work and parents, Windows 10 for home PC and systers laptop. But what if you keep your films collection on this USB drive, and you absolutely don’t want to format it or look for another place for your data?

WinUSB – simple and portable application wich helps you create single multiboot Windows USB drive without formatting for boot Windows 7/8/10/PE in both existing platforms: UEFI and BIOS using NTFS and FAT filesystems!

So, let’s start

Before creating Windows multi-bootable USB drive, first you need to ensure that you have an ISO file with a Windows distributive or an installation DVD disc. If you don’t have any of this, read here, how you can download Windows 10 ISO from Microsoft website.

Ok, now, when you have Windows distributive, we can begin to solve the task of creation your multiboot USB stick.

To start, you need download and run WinUSB.


Download WinUSB

Choose USB flash drive

The first you need to choose a flash drive wich will be multi-bootable. You need a USB stick at least 4 GB of free space.

When you plug it in, I will show it automatically in combo-box. The upper horizontal line below of stick name represents the ratio of free and used space. The second line represents a space on drive required for placing selected distributions. If you remove some data from selected drive or unplugging it, I’ll see it automatically.

Define a distributions list

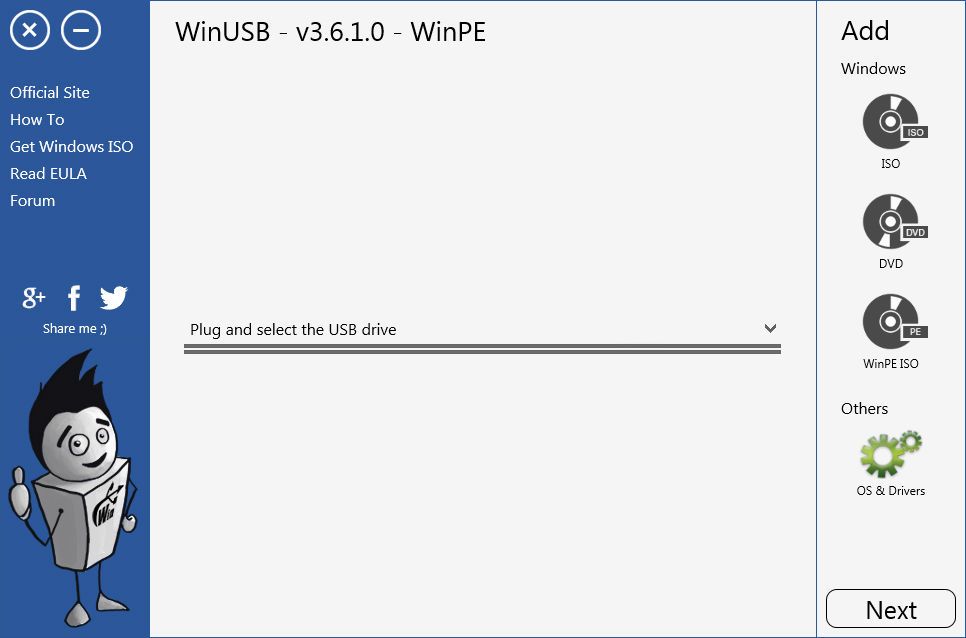
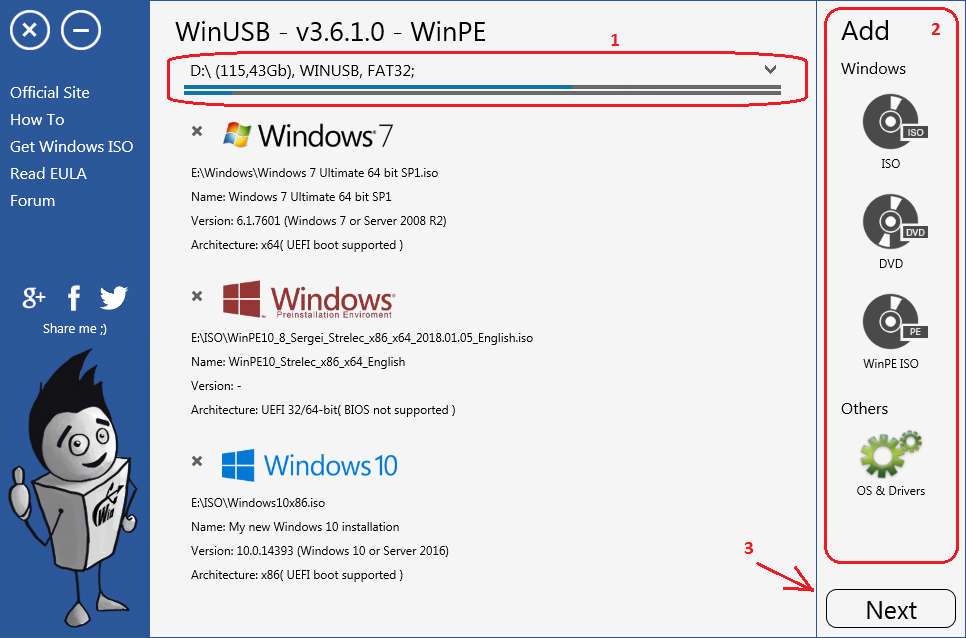
When USB drive chosen, you may add any number of Windows distibutives to the list by clicking ISO/DVD/PE button depending on what type of distributive you have. After required distributives selected, it will be shown in application like on screenshot below. Additionaly you can define a name of boot menu points for all of them. Note that the name for Windows PE will be a prefix for all points containg inside your WinPE ISO.

Choose file system, if necessary

When you add necessary Windows distributions click “Next” button to open the “Format settings” form.

If you have enough space on flash drive to put windows distribution to it without remove something, as on screenshot bellow, I’ll ask you whether you want to format it to one of known operation systems to get clean Windows USB drive.

But if space is not enough, I will have to insist on formatting to release it, because I don’t know what files on drive are important for you and what does not. Of course you can click “Back” button, transfer your files in a safe place, then open “Format settings” again.

In text under check-boxes, you can see additional information about selected by default work mode and causes of this choice.

Ok! When you will ready just click “Yes” button, I’ll take care of the rest!

Note! Booting in UEFI with NTFS USB drive required disabled boot security option.

Burning process

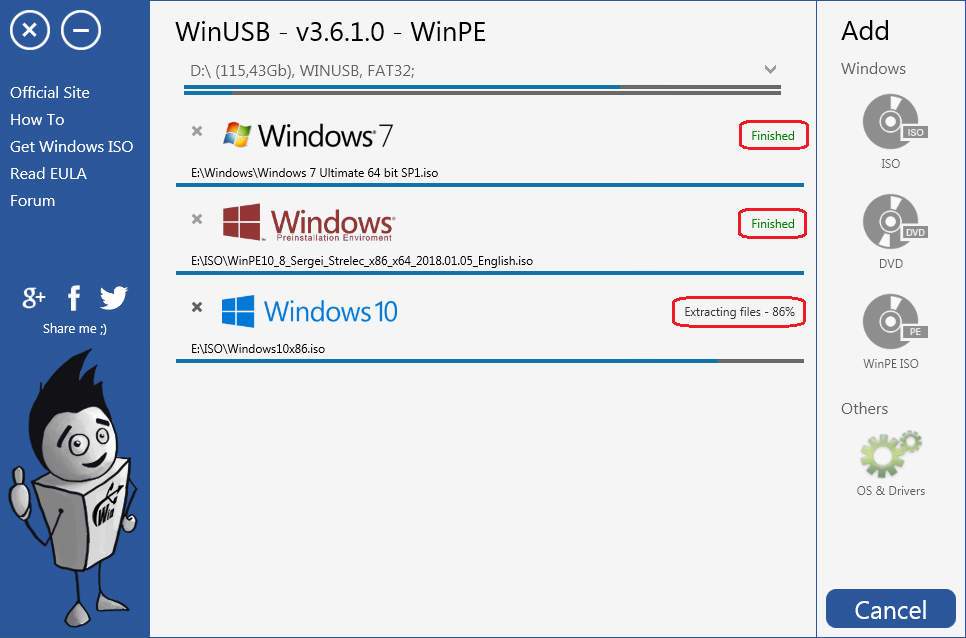
After you submit format settings by clicking “Yes” button, process will start. When format will finished/skipped, all selected distributions will turns to written to a USB drive.

Cancel, deactivate and activate distributives

While burning flash drive, you can do action bellow:

  1. Cancel current burning
  2. Disable does not yet started
  3. Resume disabled

Pause button

By click Pause button you will deactivate distribution, that means it will not start follow his turn. If you will not activate it until others have finished, process will finish without it.

Resume button

By click Resume( Play ) button you will activate distribution, that means it will start follow his turn or after current burning will finish.

Cancel cross-button

By click Cancel button you will stop burning distribution immediately with following deleting it from USB drive.

Well done!

When all Windows distributions will be written to USB drive, I will notify you using small window like shown bellow.

Continue?

Ok! Now you already have multi-bootable Windows USB drive, but if you want add more distributions just click “Continue” button and repeat the process. All new selected distributions will be simply added to already existed. All burned Windows distributives will be listed in WinUSB any time you plug this USB drive.