
Hello everyone. In this article, I am going to show you how to create a Windows 11 bootable USB on Ubuntu using the GParted project.
Updating Your System
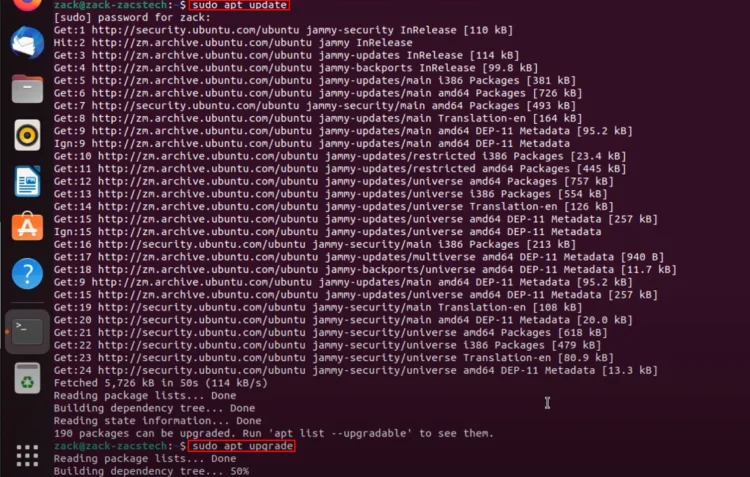
Before we begin, if you’re using Ubuntu, it’s a good practice to update your system. I will show you how to create a Windows 10 or 11 bootable USB in Ubuntu. You can start by updating your system by typing “sudo apt update” in Terminal. If there are any packages that need to be upgraded, you can upgrade them by typing “sudo apt update“.
Downloading the Windows 10/11 ISO
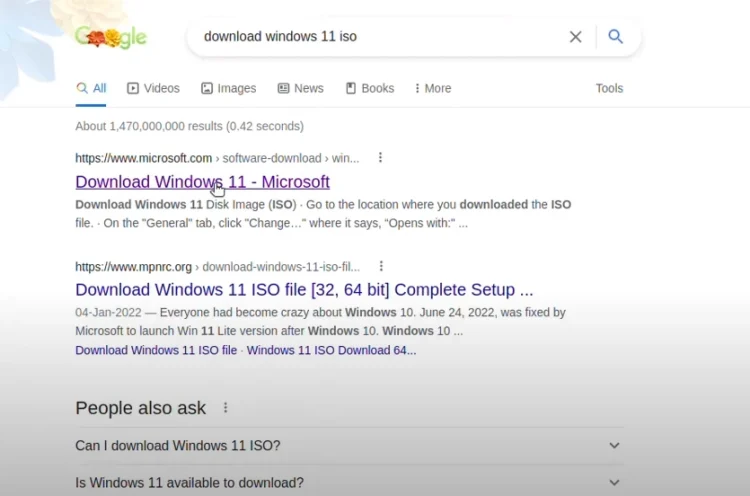
So, the first step is to download the Windows 11 ISO image. Open your favorite browser or simply use the default browser that comes with Ubuntu. Simply search for “download Windows 11 ISO” and you’ll get the Windows 11 ISO image from Microsoft’s official website.
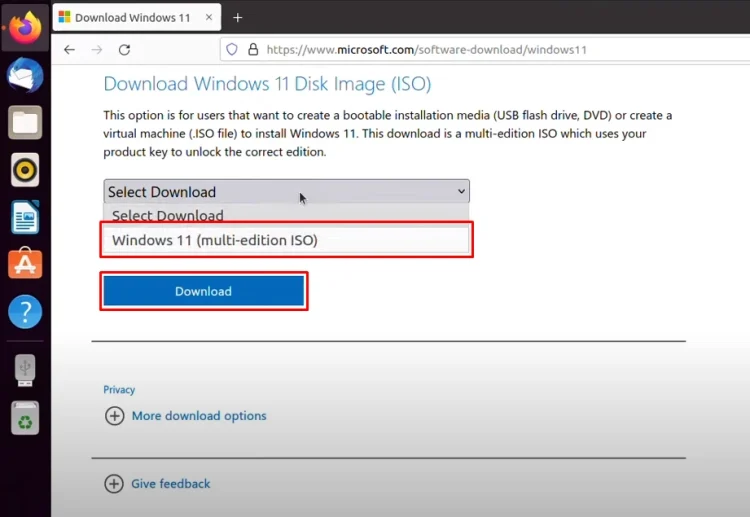
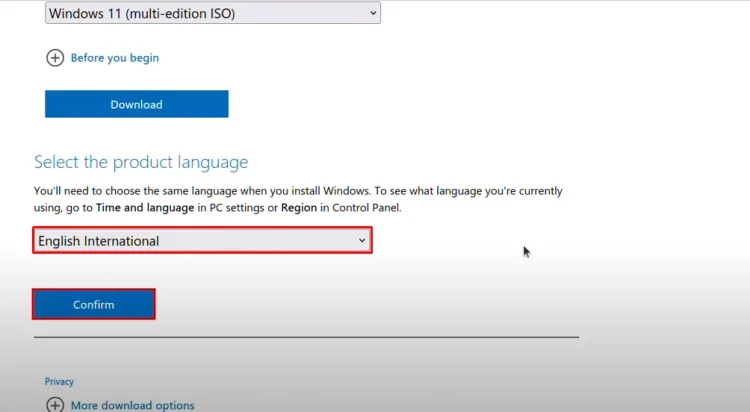
After that, you have to select the Windows 11 ISO image edition and click Download.
Choose a language and click Confirm.
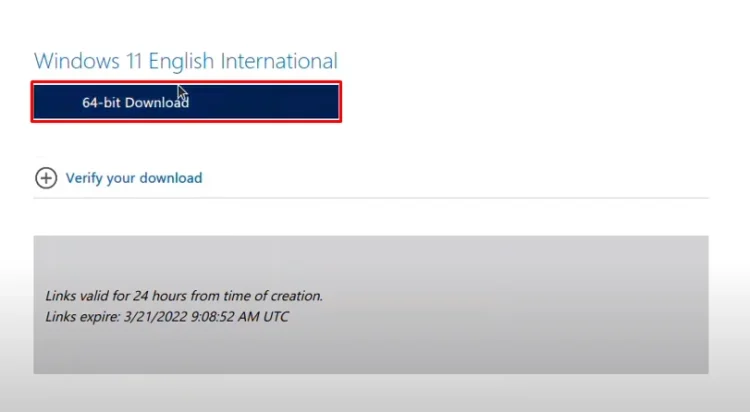
Then click 64-bit Download and save it. It will save the file to your computer.
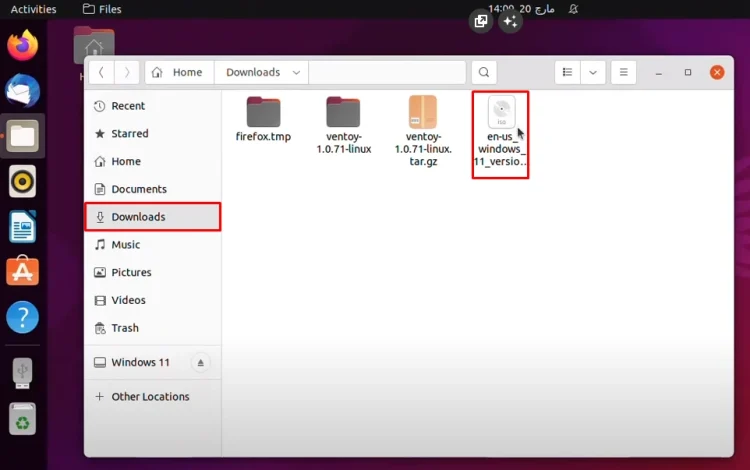
Now, I’m going to insert it because I already have it. If I have to show you, it’s in the Downloads directory, which I have simply imported from my main PC. The size is around 4 GB.
Preparing the USB Flash Drive
The second step is to attach the USB flash drive to your computer. I’ve already done that, so there’s no need for me to attach it.
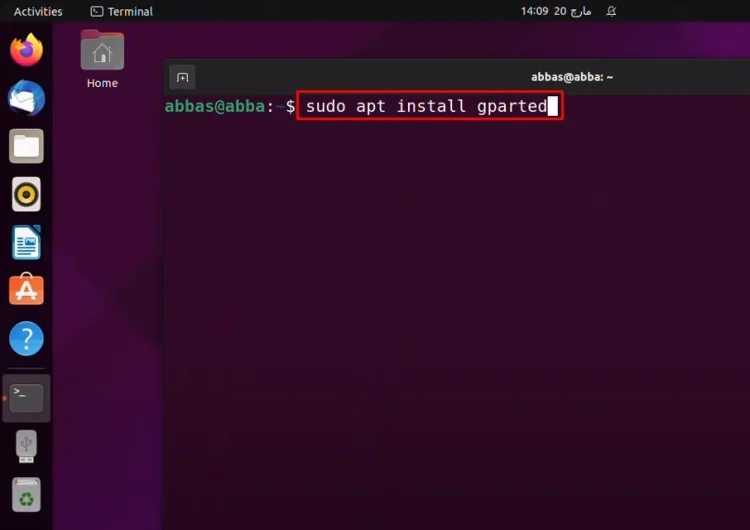
The third step is to install GParted onto your computer.
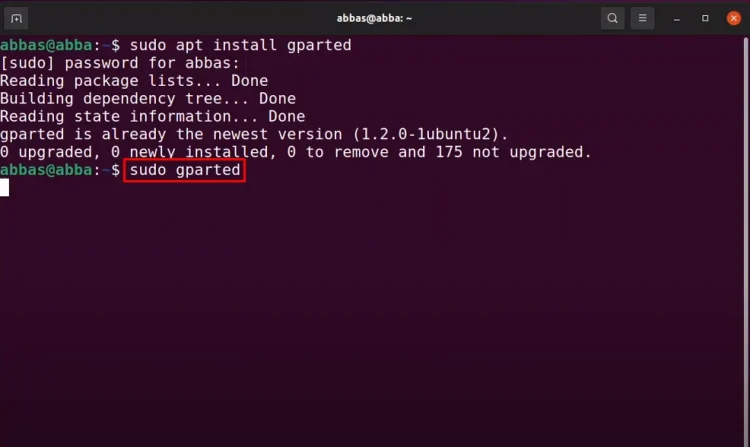
You can use the Ubuntu Software or the Terminal. I prefer the terminal because it’s faster. Once it’s launched, simply type “sudo apt install gparted“.
The next step is to launch GParted, typing “sudo gparted” in Terminal.
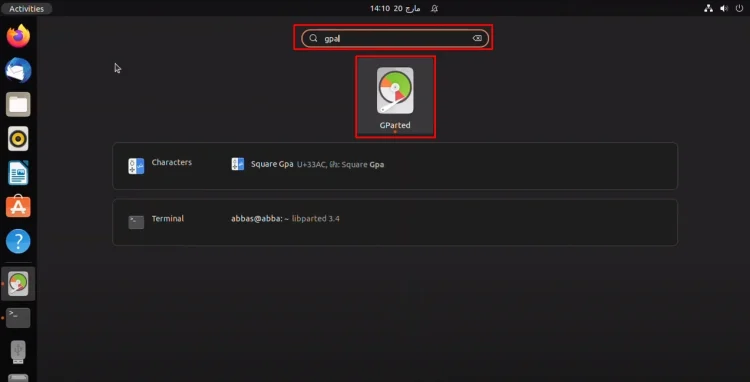
You can also launch GParted from Launchpad. Just simply search for GParted and launch it.
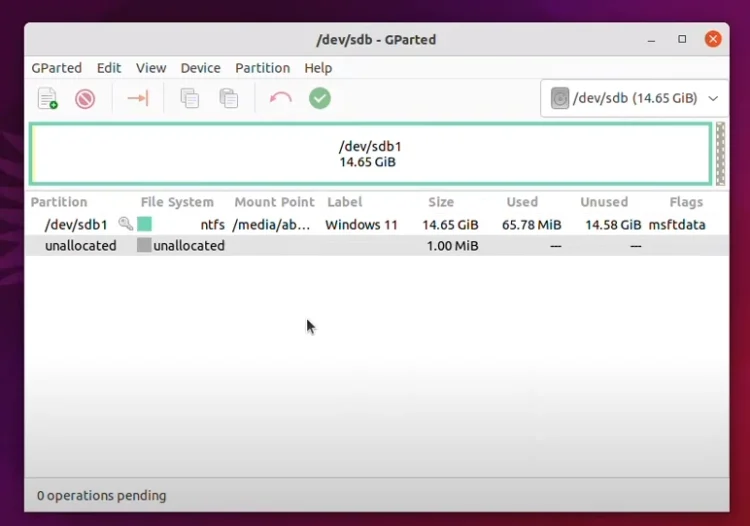
Once it’s launched, select the USB flash drive.

Partitioning the USB Flash Drive
By default, you can see that it’s a bootable USB flash drive of Windows 11.
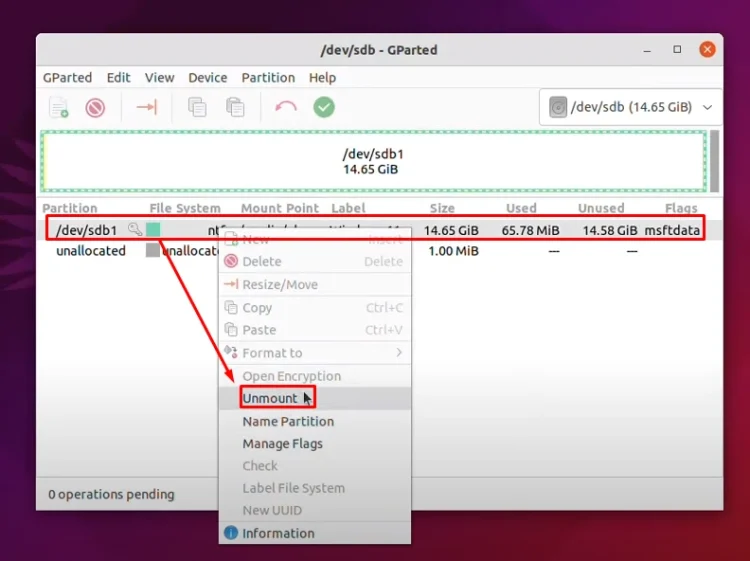
For now, I have to delete all of them and then I’ll show you how to create them again from the beginning.
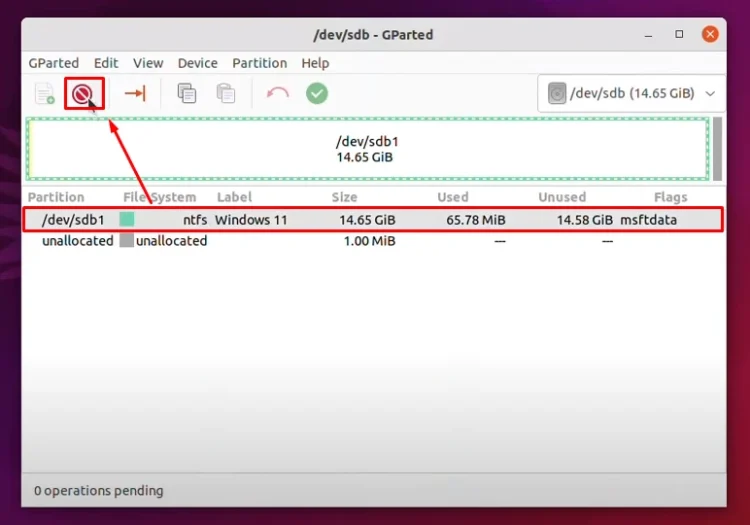
Let me delete it first. You have to unmount it, then delete it. Sorry for that. Now delete.
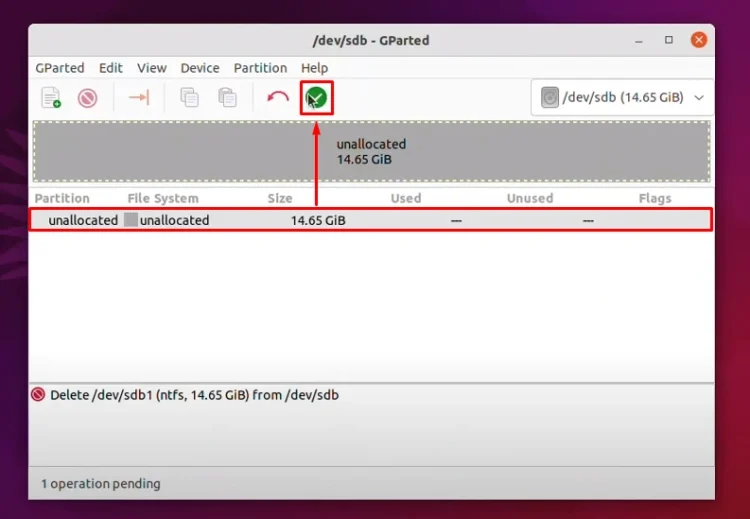
Okay, it is deleted.
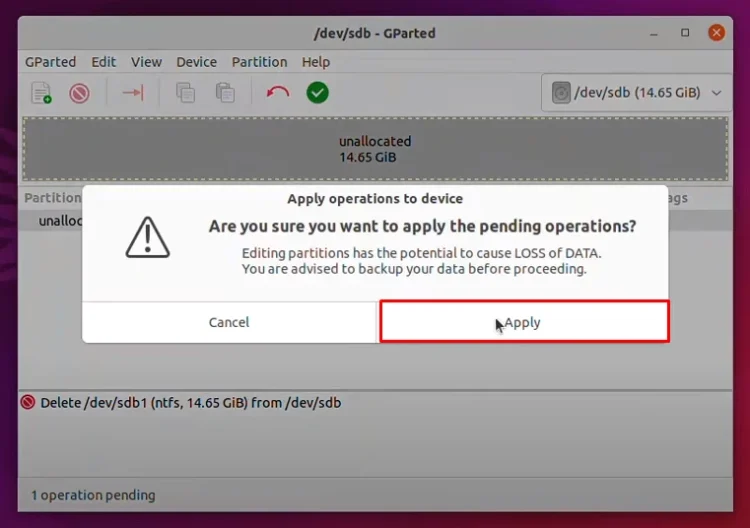
Now click Apply.
Once it’s removed, we need to create a partition for it. Go to Device and click Create partition table.
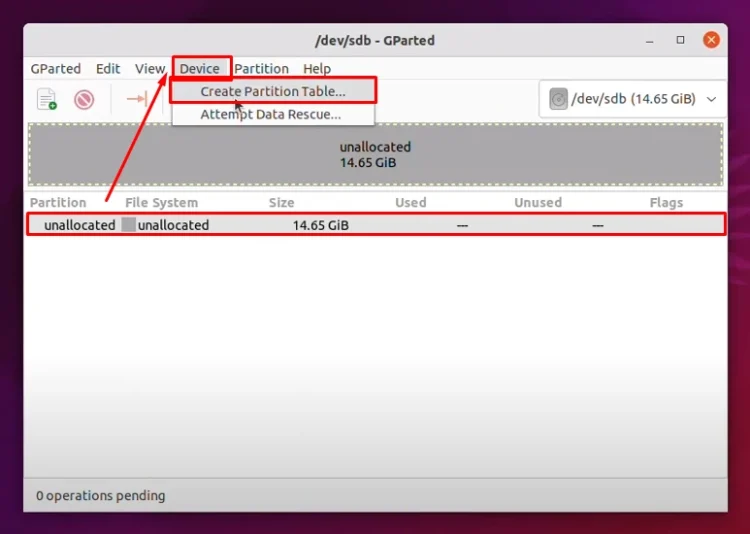
From here, select a partition style for Windows. We are going to choose gpt. Click Apply.
Remember, it’s going to remove everything from your USB flash drive, so back up your files.

Formatting and Copying Files
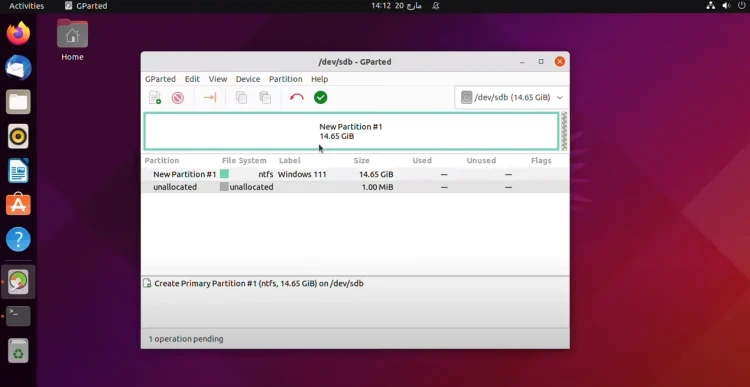
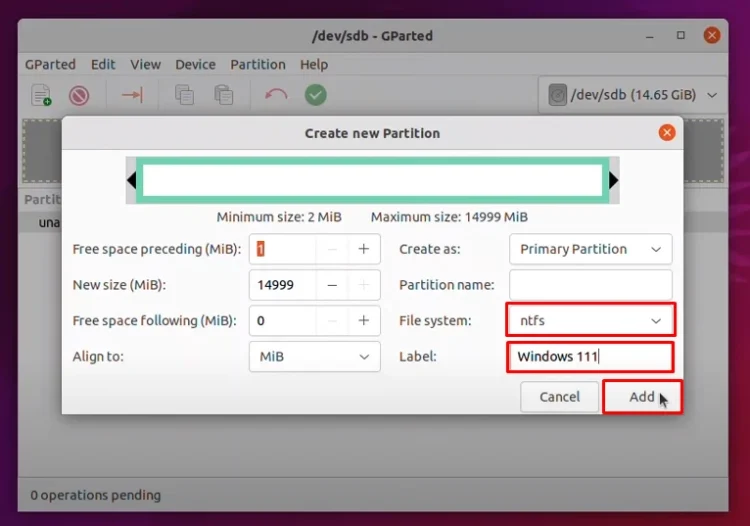
The next step is to create a file system for it.

By default, Linux personal file system is ext4. Windows is using NTFS. We’re going to choose NTFS. We can also label the USB flash drive. I’m going to name it “Windows 111“. Click Add.
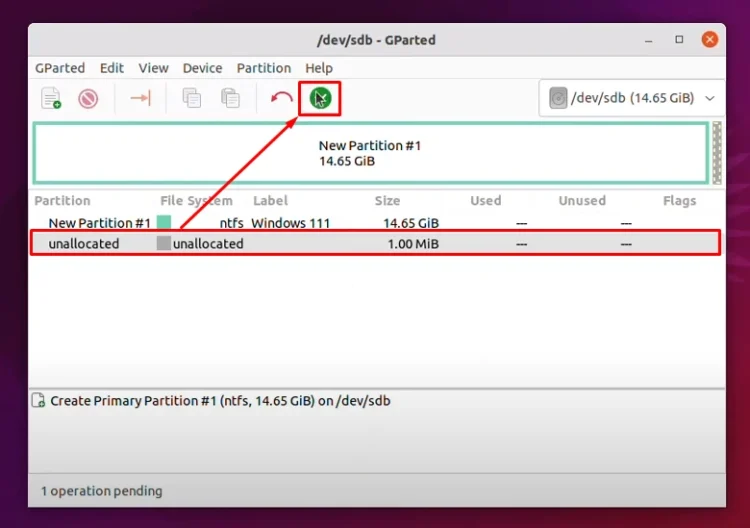
Now you can see that it’s done, but the changes have not applied. Click Apply and wait for it.
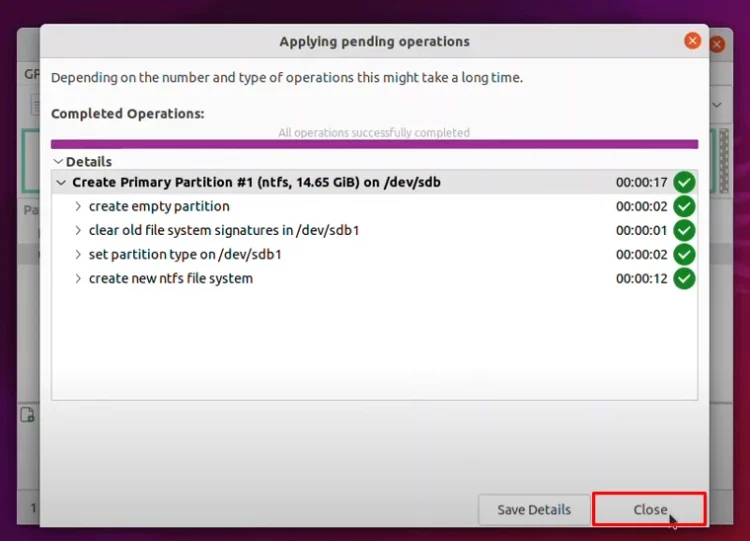
Once it’s done, you can close it.
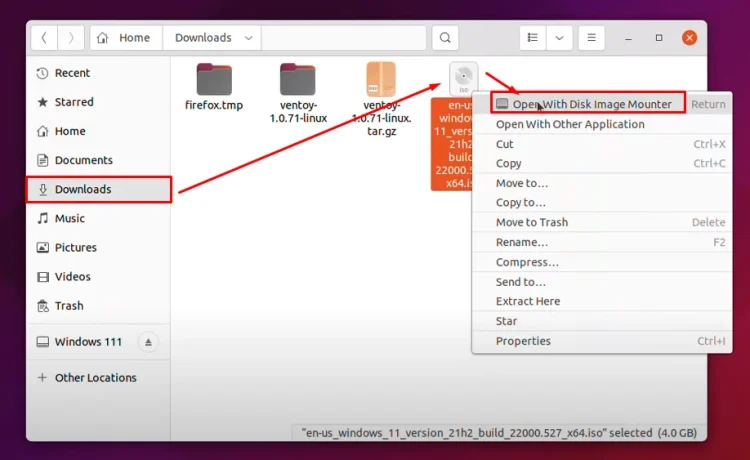
The next step is to open files and go to the Downloads folder where Windows 11 is located. Right-click on it and choose Open With Disk Image Mounter.
Finalizing the Bootable USB
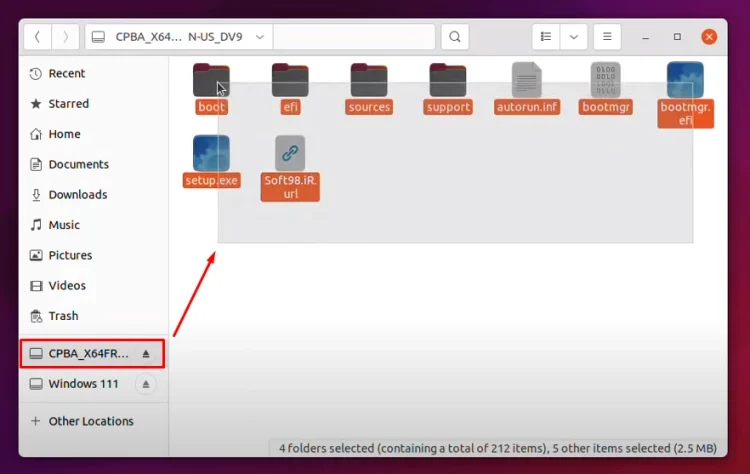
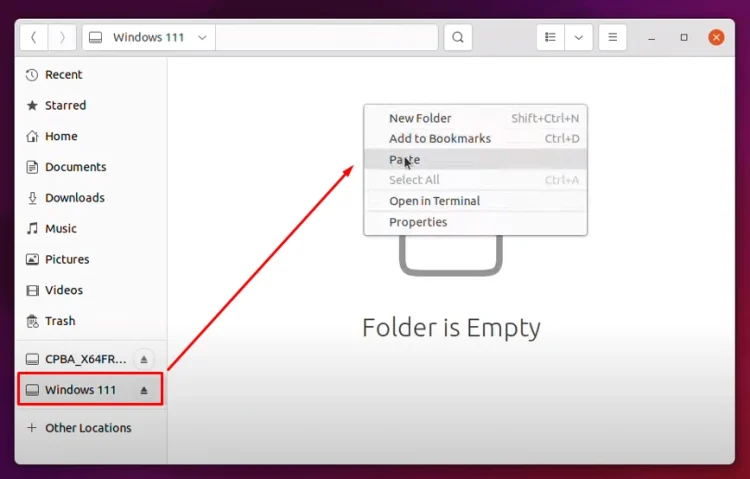
Here you can see that Windows 11 is mounted. Right-click, copy, and now go to the USB flash drive and paste them here.
During the copy of the files, you will not face any type of error. If you face any type of error, it means the Windows 11 ISO that you downloaded from the internet has been corrupted. Maybe the speed of your internet connection was not fast and somehow it got corrupted.
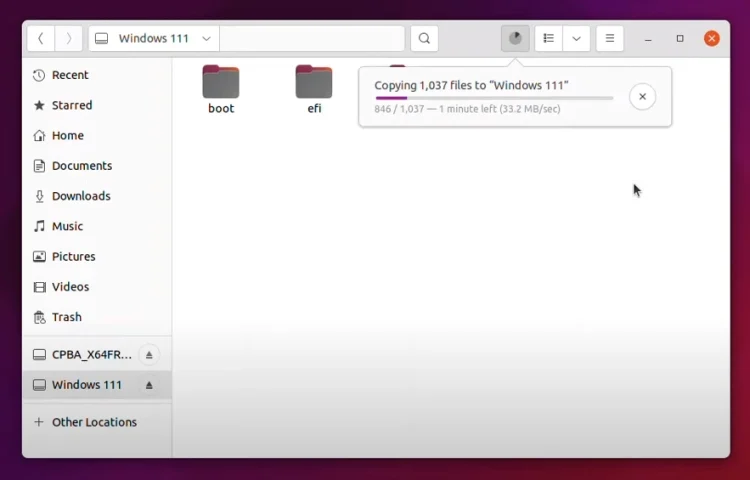
So basically, this is how you can create a Windows 11 bootable USB. For now, I am going to wait until the files are copied from the ISO inside the USB flash drive.