
I’m going to walk you through the steps of setting up a Windows 10 bootable USB stick. It just takes a couple of steps, and we’re going to be using a tool called Rufus, so let’s get to it.
Prerequisites:
- USB Stick. Prepare a USB flash drive with sufficient storage capacity to accommodate the Windows 10 installation files. A minimum of 8 GB is recommended, though larger drives are preferable for smoother operations.
- Operating System Image in ISO Format. We will download it under “Choosing Windows 10 Edition and Downloading ISO”.
- Rufus Software. Rufus is the tool used to create the bootable USB drive. We will download and install it below.
- Internet Connection. Ensure you have an active internet connection to download Rufus and the Windows 10 ISO image.
- Basic Computer Skills. Familiarity with navigating a web browser, downloading files, and using Rufus software is beneficial.
These prerequisites will help ensure a smooth process when following the steps outlined in the article.
1. Downloading Rufus and Preparing USB Drive
We’re at our Windows 10 desktop. I’m going to open up my browser, and the website that you want to go to is Rufus.ie. What we’re going to do over here is we’re just going to scroll down a little bit here, and we’re going to be downloading the tool here.
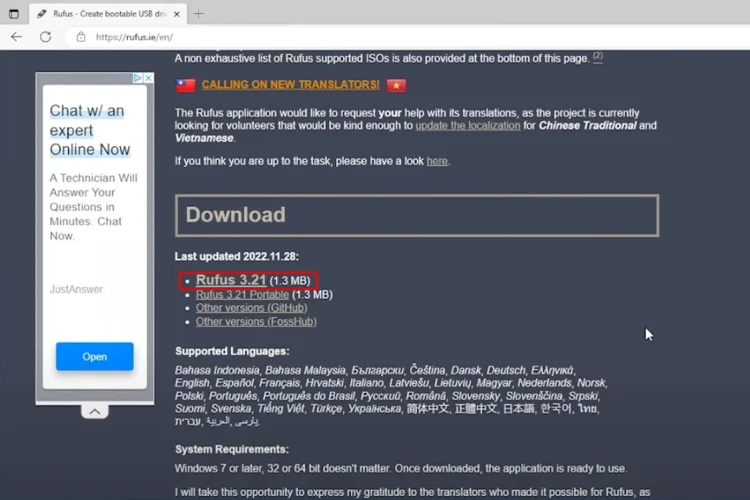
Rufus 3.21 is the latest one that’s out. I’m going to click on that, and it’s going to automatically download. It’s not a very big file. It’s just under 1.5 megs.
2. Selecting Bootable ISO Image and Downloading Windows 10
We’ll go ahead and click on that to open it.
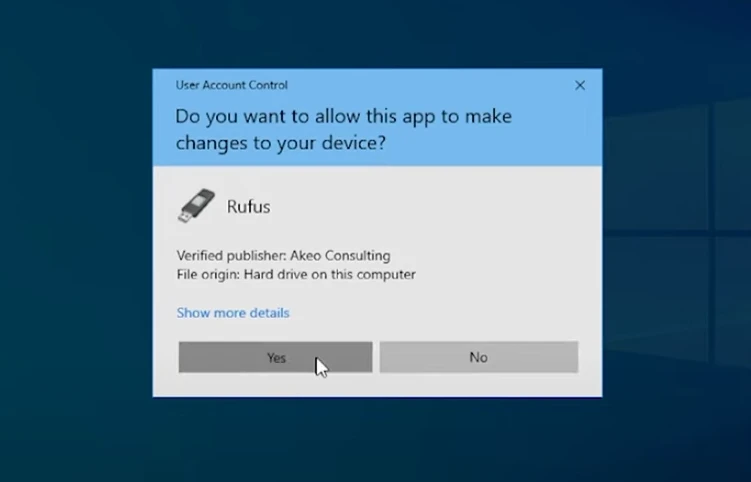
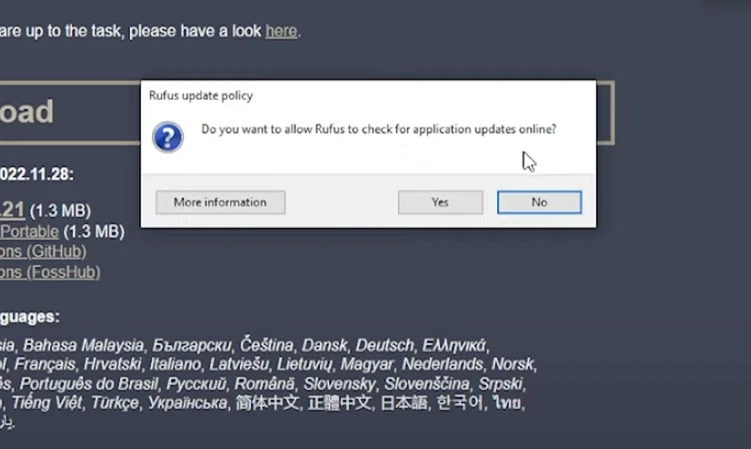
If you get prompted like this, just say Yes.
Now it wants to do an update policy if you wanted to check for updates online. I don’t see any issues with this, but if you want, you can say No. I’ll say Yes to that so it automatically updates.
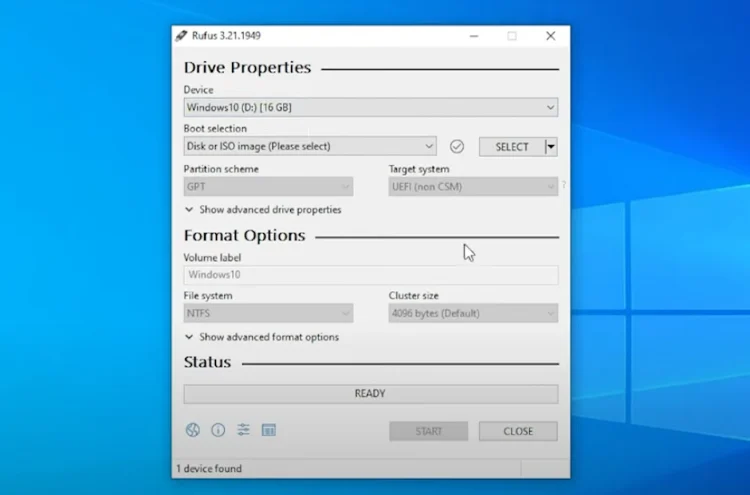
So we can take a look at the Rufus window over here.
3. Choosing Windows 10 Edition and Downloading ISO
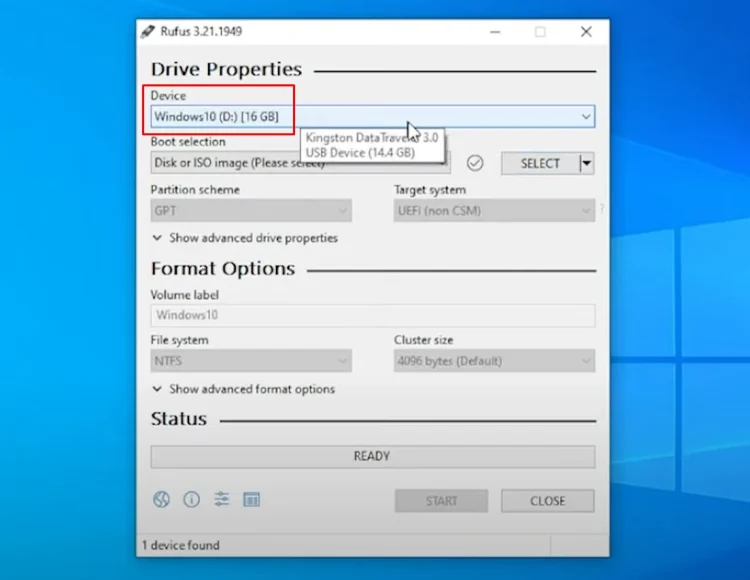
Right now, I don’t have any devices plugged in. I’m going to be plugging in this USB Kingston flash drive. I find the Kingston drives and the Patriot drives very reliable. There we go.
4. Setting Up Rufus and Starting the Process
So right now for the boot selection, we have the option for Non-bootable, FreeDOS or Disk or ISO image.
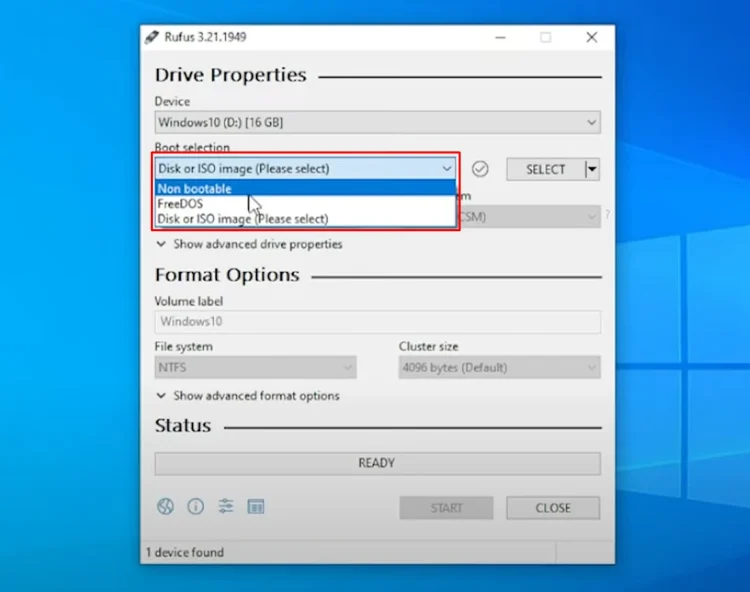
We’re just going to be leaving it as Disk or ISO image. And then over here on the select section, we can select to Download.
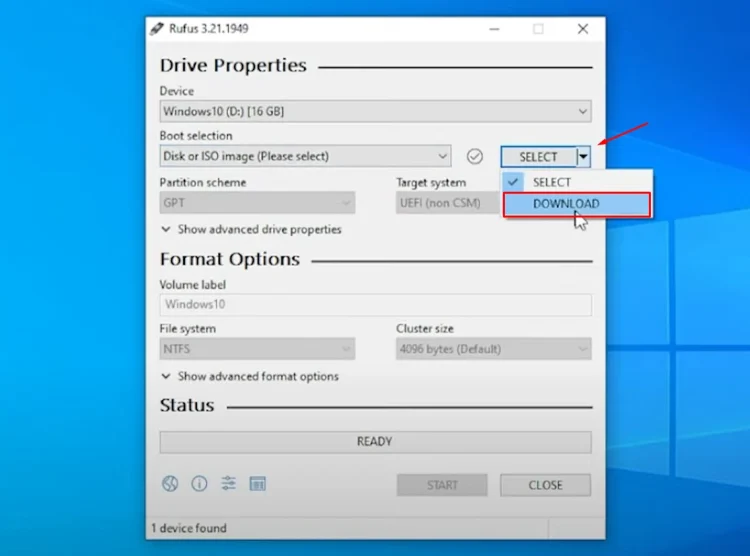
Now this saves a lot of hassle of you trying to find the ISO. It’ll get it for you. So go ahead and select that.
5. Customizing Options and Formatting USB Drive
Alright, so we’ve selected the download in the list and now we’re just going to click on Download. All we have to do is select the operating system that we want.
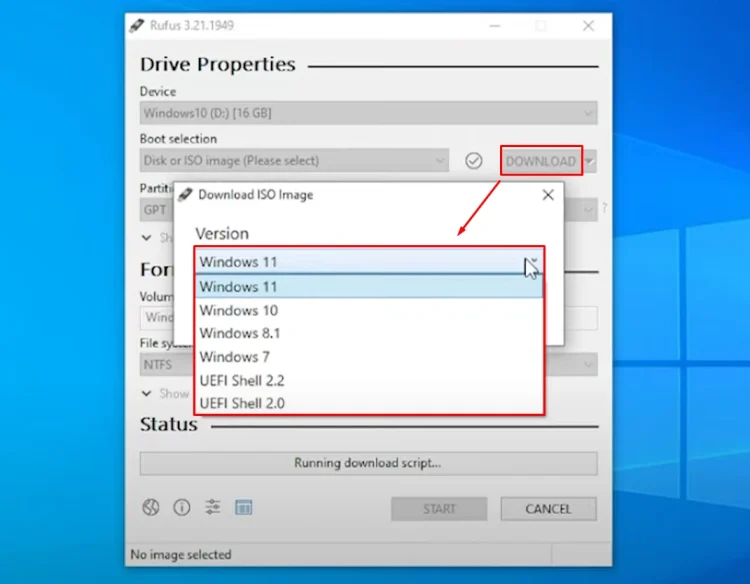
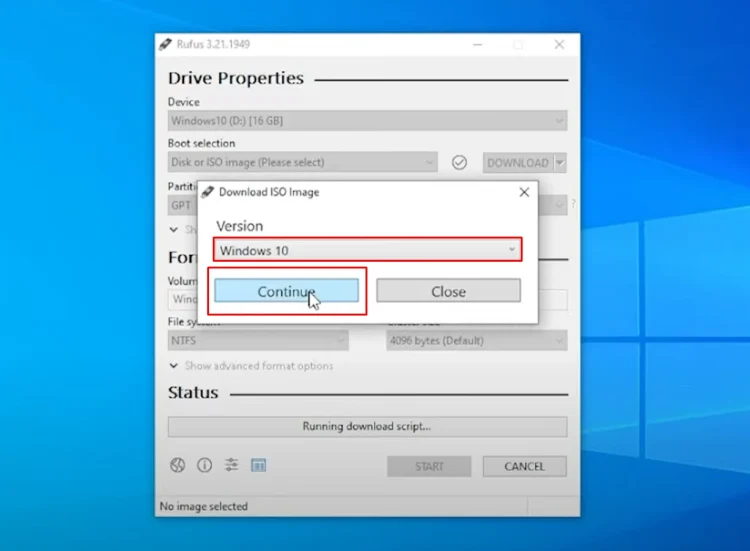
So in this video we’re going to be doing Windows 10 but as you can see that we have versions 7, 8, and 11 as well. So go ahead and select 10 and then click on continue.
And now you get to select the release.
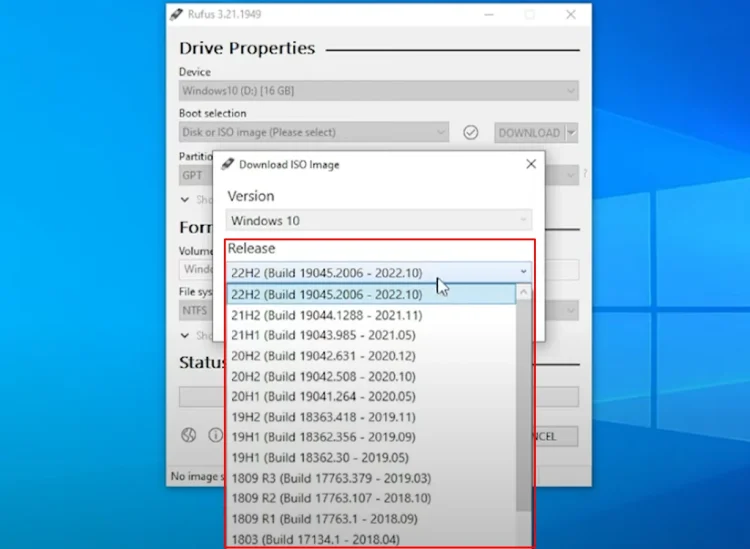
So the release build versions that are all here we can go ahead and select the latest one that they have and now we have the latest release selected here in this.
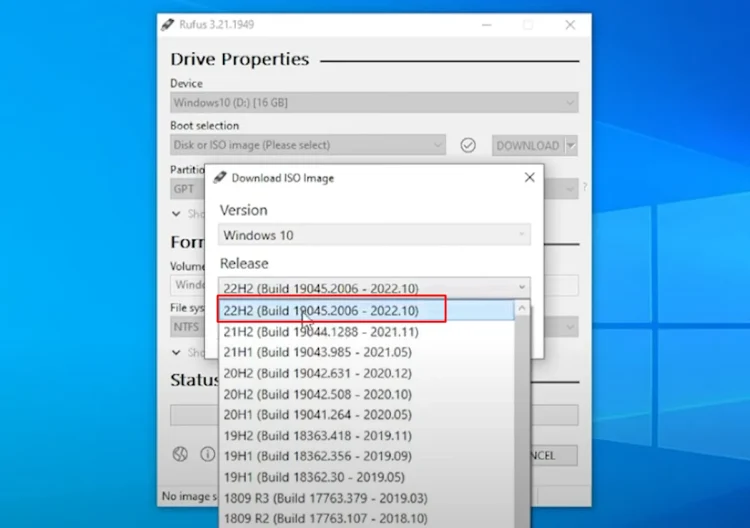
All we have to do is click on continue.
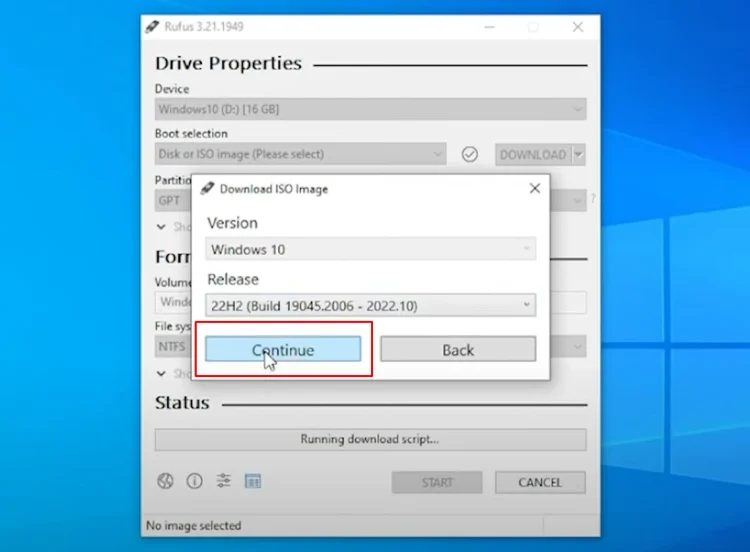
6. Completing the Process and Verifying Setup
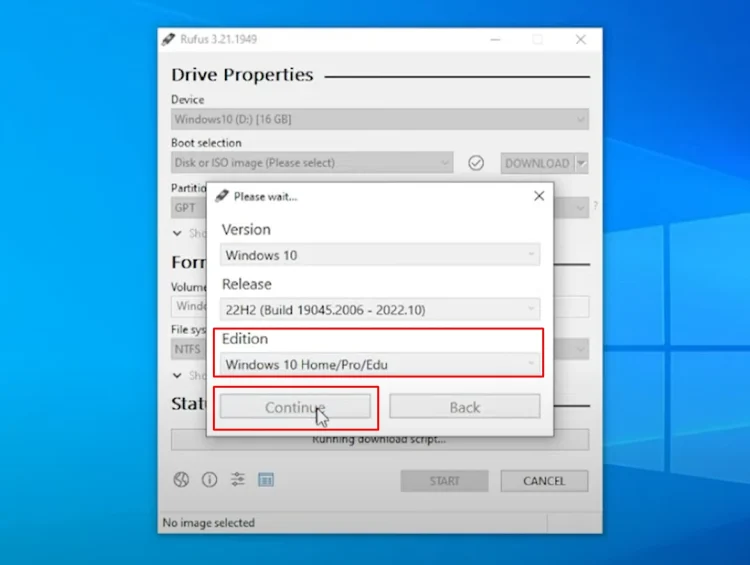
And now it’s letting us select the edition. It is the only one that you can select under edition. And you click on Continue.
So now it has the language to select. English International is the one over here by default. You can go through the list and find out which language you want. If you want something more specific, I like using the United States version and the architecture.
If you’re using a 32 bit system system you want to use x86. But if you’re able to do x64 that is going to be the one that you want.
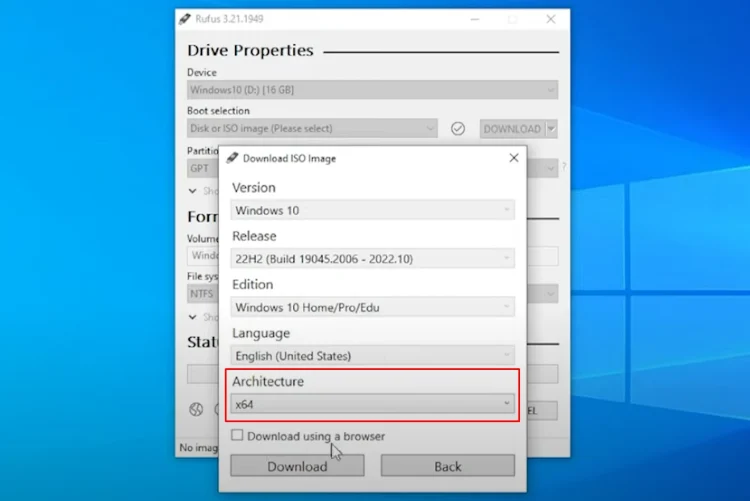
And the last option over here is the option to download using your browser or just download in the background. I’m just going to leave this unchecked and click on Download and it’s asking me where I want to save this image file.
I’ll be saving it in my Downloads folder.
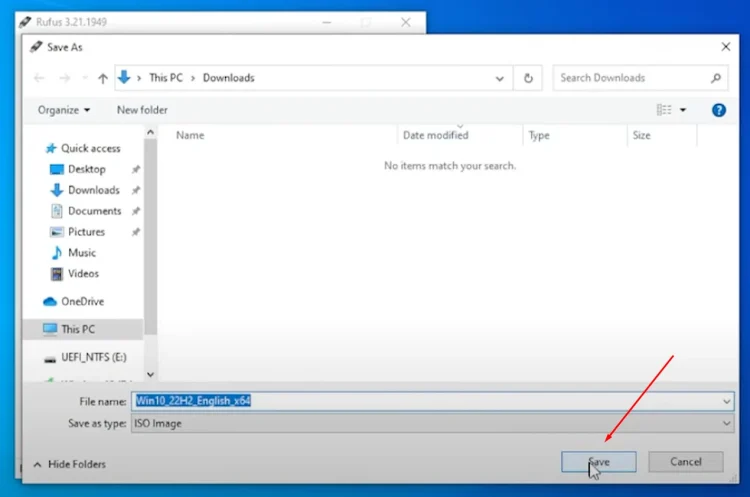
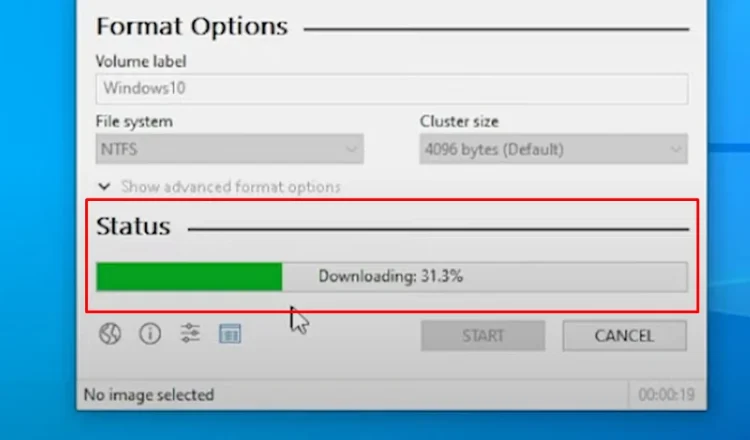
Go ahead and click on Save, and you can see that it’s now downloading the image. The speed of this download will depend on your connection.
7. Finalizing and Testing
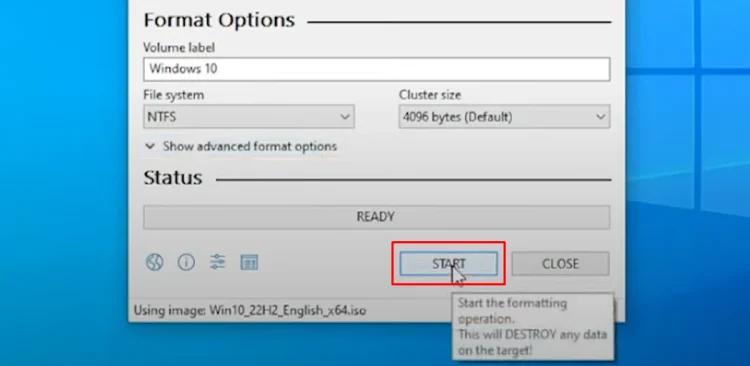
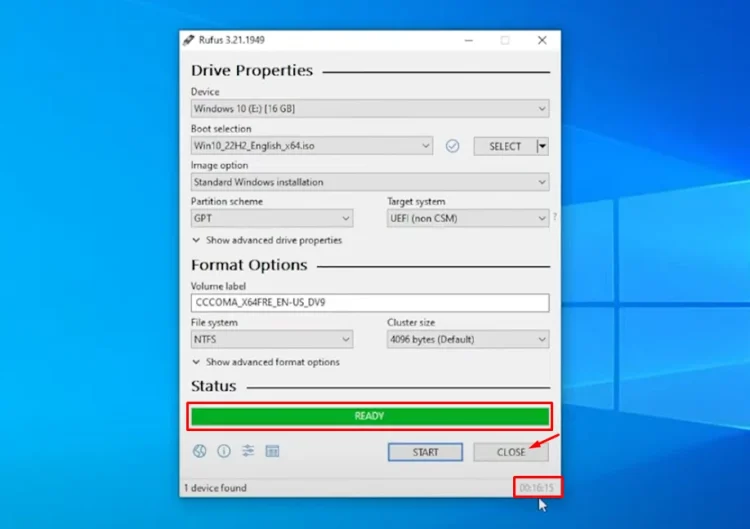
Okay, the download is now complete. We have a volume label. This is going to be the label of the drive. You can call it whatever you want. I’m just going to call it Windows 10.
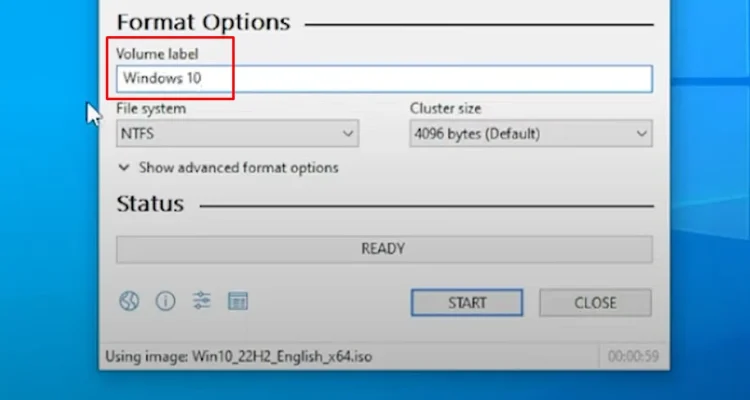
And the next thing that you have over here is the file system. Inside file system, NTFS is the only one selected is definitely the one that’s recommended. The cluster size is 4096. This is going to be the best one as well in here it’s also the default one. And then below in the advanced options you can choose a quick format.
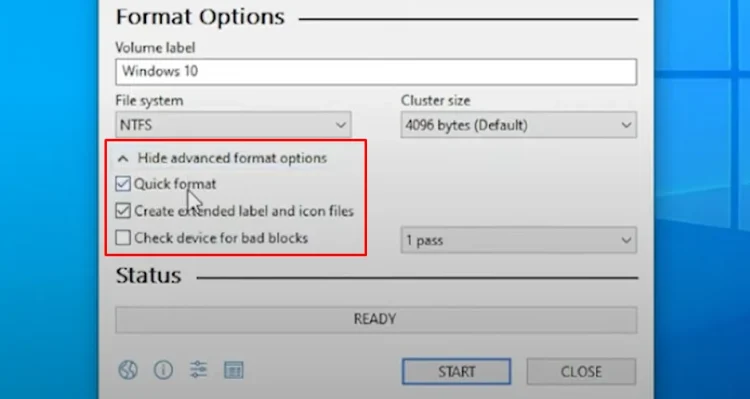
If you uncheck this it’ll take more time but it does a low level format. So leave it as is. And then we’re going to go ahead and click on the Start button.
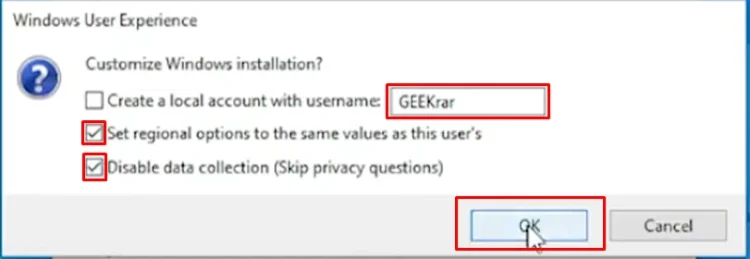
And now for the customized options, you can give it any name that you want. So the username when you log in here can be whatever username you want. I’ll just type in GeekWare for mine, but you can just type in any name here for the login screen. Okay. And the other two options are set regional options the same as same values as this user. That’s fine with me and i like to disable all the data collection. So i’m going to check that as well and then click on OK.
So it’s just letting you know that everything on this USB drive will be removed. It’s going to format it right now when you click on OK.
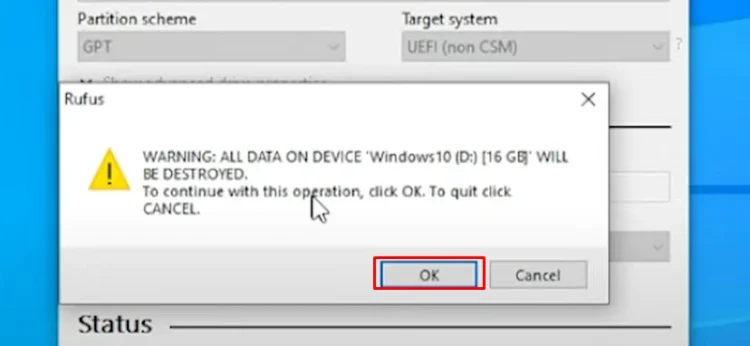
And i’m going to go ahead and do that. And now it’s going to be copying and writing everything to the USB drive this takes a couple minutes what i’ll do is i’ll jump over to the next step.
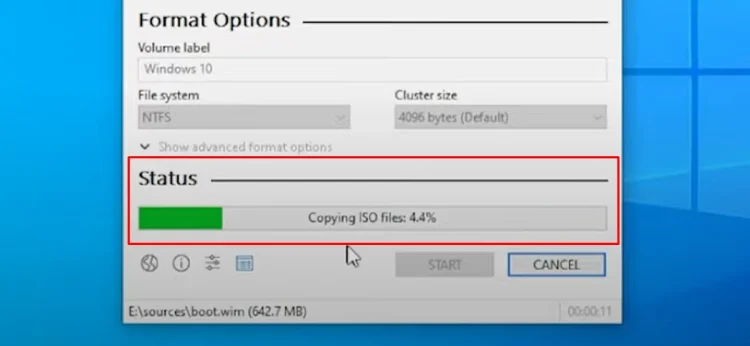
So that process is now complete. You can see it took over 16 minutes, 16 minutes and 15 seconds to be exact. But our image is now ready. We can go ahead and click on close.
And if we go over to our file explorer, if we expand this a little bit here, you can see that we have our drive listed here as Windows 10.
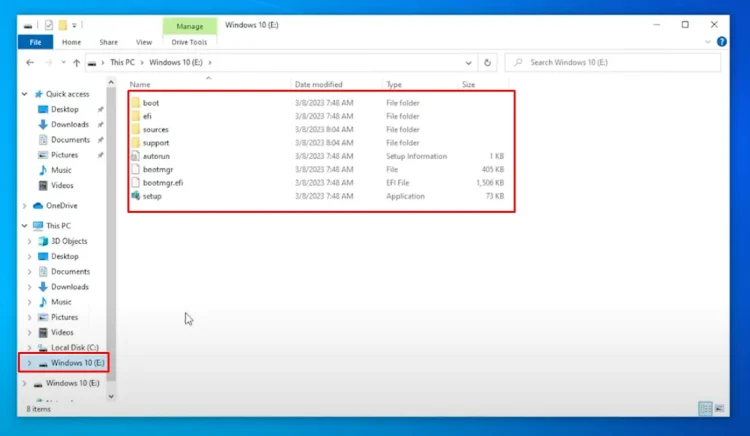
That’s the label that we gave it. When we select it here, you can see all the setup files that you need for your windows 10 boot up USB drive and that’s how you do it that’s how you set up a windows 10 bootable USB drive. If you have any questions, go ahead and put them in the comments below.