
If, when trying to install Windows 10 from a flash drive, you encounter an error message stating that installation on the selected disk or partition is impossible due to the presence of an MBR partition table, or you have a computer with a legacy BIOS boot mode instead of a modern UEFI, this article will help you create Windows 10 bootable USB drive to MBR legacy disk for you.
The essence of the problem is that the system is configured in UEFI mode, and the disk uses the outdated MBR (Master Boot Record) partitioning system, while the modern GPT (GUID Partition Table) is required. This may be because your computer has been around for a long time, and modern systems operate according to new standards. A possible cause may be a previously installed Windows 7 or XP, as well as a replacement hard drive.
Briefly about MBR and GPT
There are two predominant styles of partitioning data on a disk – MBR (Master Boot Record) and GPT (GUID Partition Table). Both serve the same purpose – they indicate exactly how data is placed on disk. MBR, or “Legacy MBR”, is a legacy technology that was developed a relatively long time ago. Its main drawback is the limitation of four primary partitions and support for disks up to 2 TB. The advantage is that MBR can be configured to work with almost all operating systems (GPT only requires modern systems that support the UEFI standard).
GPT is a modern solution. This format does not have the limitations of MBR, supporting up to 128 partitions per disk in Windows (and more in other OSes) and working with disks larger than 2 TB. The advantage of GPT is its higher level of reliability than MBR.
Is it possible to solve the problem by changing the MBR system to GPT?
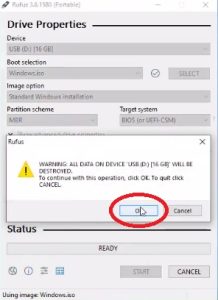
To convert a disk from the old MBR style to the new GPT without losing data to install Windows 10, you can use built-in Windows tools (command line and diskpart) and special programs that can help. But, firstly, there is always a risk of data loss and you need to make a backup copy of it, and secondly, after changing the MBR style to GPT, the system, under certain conditions, may begin to require compliance with the UEFI standard. There is a simpler solution – creating a bootable Windows 10 USB drive with specified recording conditions for a disk with an MBR.
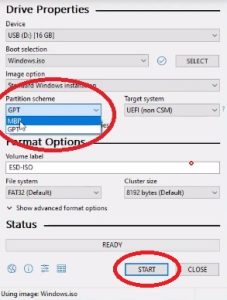
How to create a bootable usb from Windows 10 to MBR?
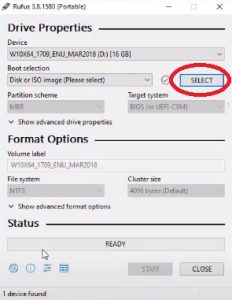
To create such a drive, we will use the Rufus program, due to its versatility and the ability to switch between MBR (BIOS) and GPT (UEFI). We reviewed the functionality of Rufus in this material. To create an ISO image of Windows 10 for recording on a bootable drive, the official utility from Microsoft – Media Creation Tool – will be used.
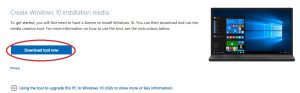
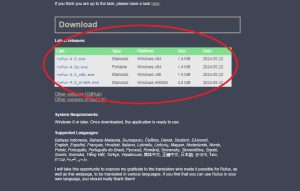
So, let’s go to the official Microsoft website to download the Media Creation Tool from Windows 10.
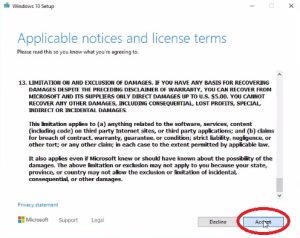
After downloading the utility, run it, read the license terms and click “Accept”.
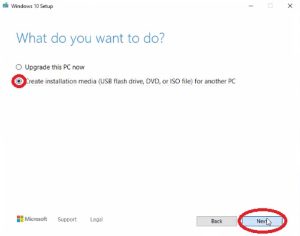
In the next step, select “Create installation media” and click “Next”.
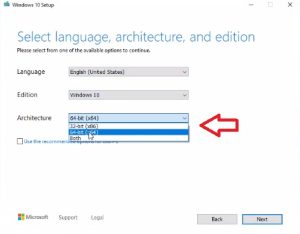
Select the language, version and architecture of Windows 10 and click “Next”.
At this step, select “ISO file” and click “Next”.


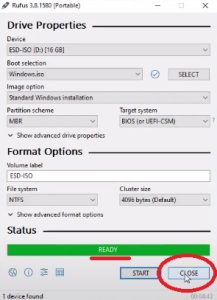
Using these steps and the help of Rufus, you can easily create a bootable USB for installing or restoring an operating system (in our case it is Windows 10), suitable for the MBR partition style.