
Looking to install Windows 11 but not sure how to get started?
This comprehensive guide will walk you through the process of downloading a Windows 11 ISO image and burning it onto a DVD. With step-by-step instructions and helpful tips, you’ll be able to successfully create your own Windows 11 installation media.
Prerequisites
Before you start, ensure you have the following:
-
- A computer with an internet connection. Essential for downloading the ISO file.
- A web browser (such as Google Chrome). Used to access the download link.
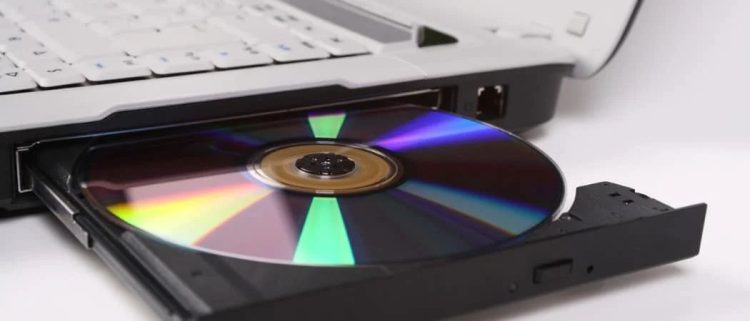
- A DVD drive. Necessary for burning the ISO image.
- A writable DVD disk. Ensure the disk is empty and has enough space for the ISO image.
- Windows 11 installed on the computer (optional, but recommended). This guide includes steps that are specific to Windows 11, which might differ slightly in other versions of Windows.
Downloading the Windows 11 ISO Image
In this article, I’ll show you how to burn a Windows 11 ISO image to a DVD. First, open up your web browser and go to Google. Type “Windows 11 ISO download” and hit Enter.
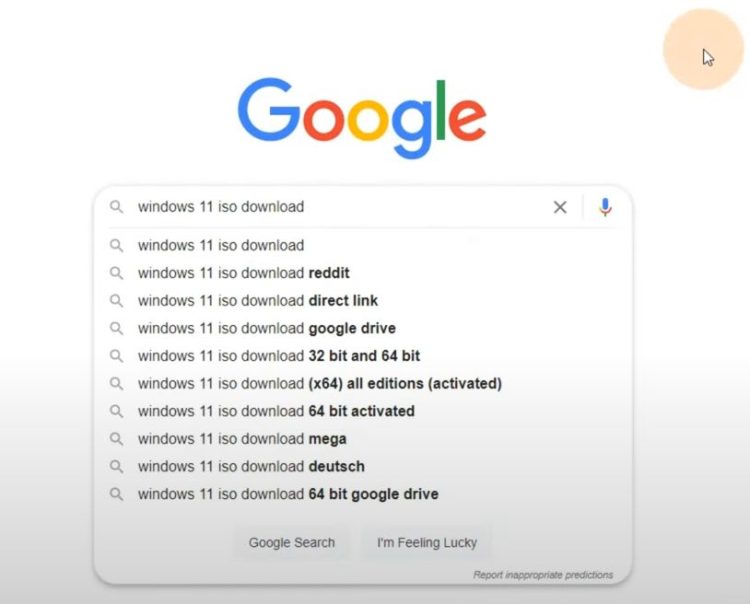
In my case, the first result is the official Microsoft website — “Download Windows 11”.

Tips:
- Make sure you have enough disk space to download the ISO image, which is around 5GB in size.
- If you have a slow internet connection, consider using a download manager to pause and resume the download.
Choosing the Download
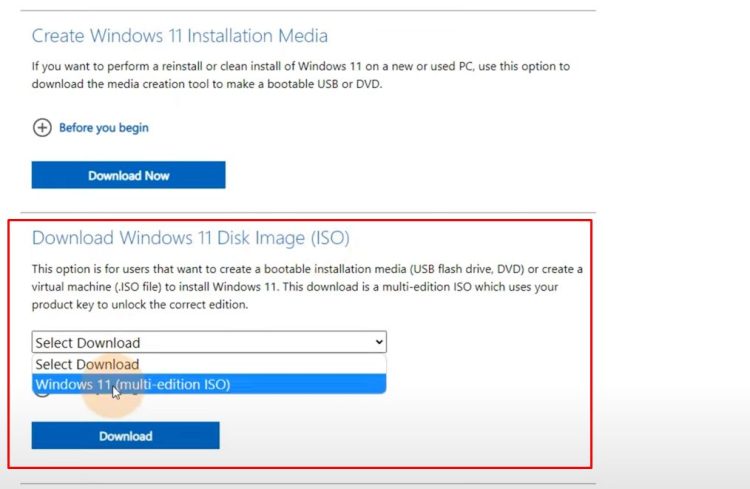
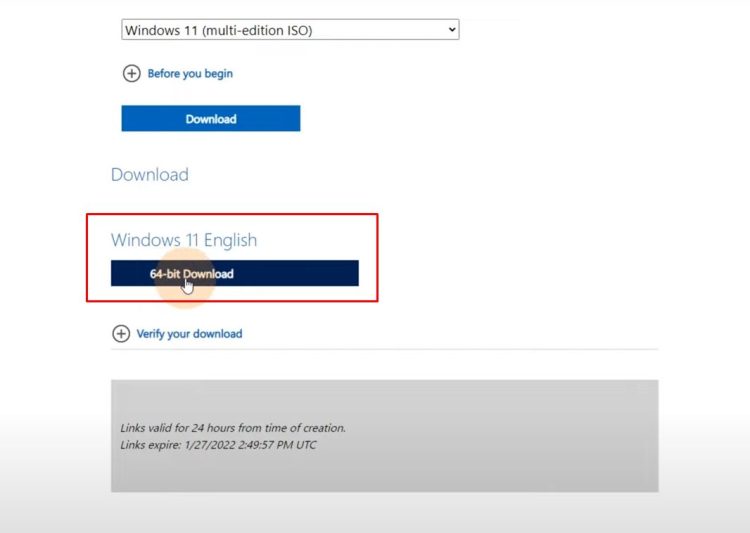
Click on the download link and you’ll see several different downloads. We’re looking for the “Download Windows 11 Disk Image (ISO)” and choose the “Windows 11 Multi-Edition ISO” and click Download.
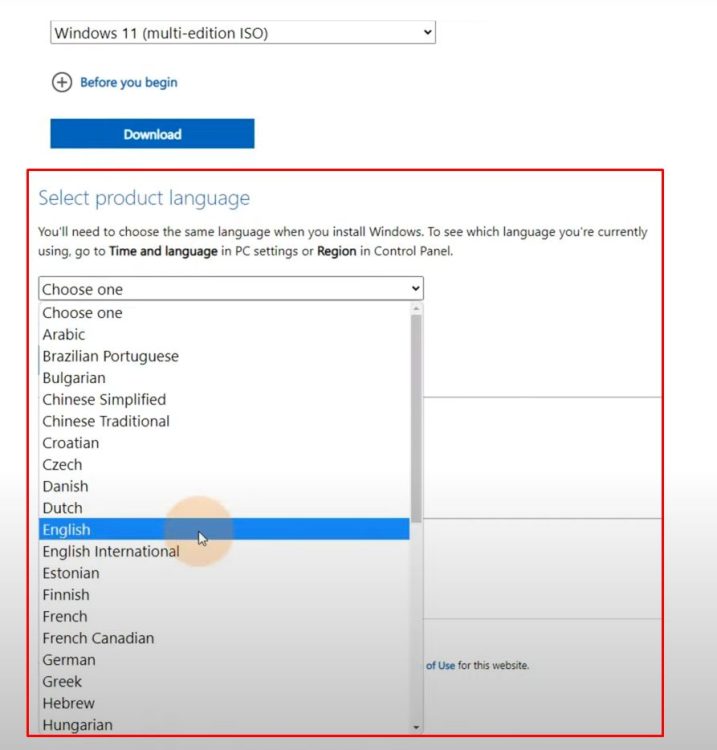
Now it’s asking us to choose the language, in my case English.
Click 64-bit Download.
Important: If you’re not sure which architecture (32-bit or 64-bit) your computer uses, you can check your system properties to find out.
Just wait until your download is complete.
Troubleshooting: If your download gets stuck or fails, try restarting the download or checking your internet connection.
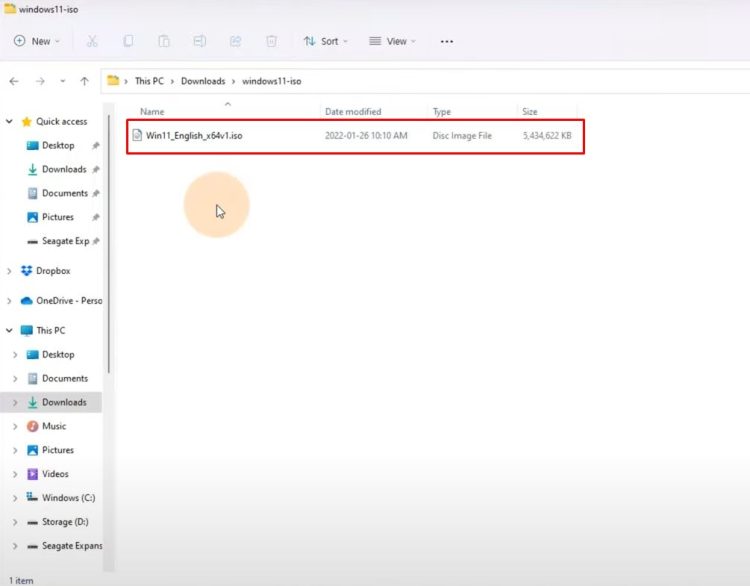
Once the download is complete, locate your ISO file. Here’s my ISO file for Windows 11.
Burning the ISO Image to a DVD
Now it’s time to burn this image to a DVD. Do a right click on the ISO file and go to Properties.
Tips:
- Make sure you have a writable DVD disk and a DVD drive that can burn DVDs.
- If you’re using a laptop, ensure that your DVD drive is enabled and functioning properly.

Okay, now find Open with and choose Windows Explorer. If it’s already Windows Explorer, then you don’t have to change. But if it’s something else, click change and choose Windows Explorer.
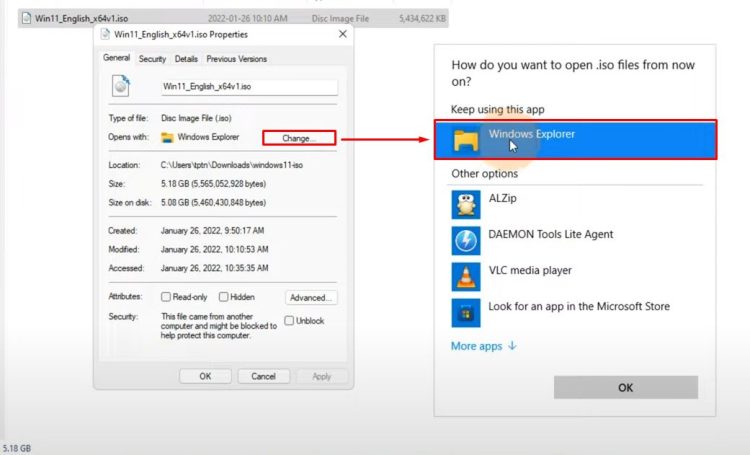
That is very important. Hit ok, click apply, and click ok.
Burning the ISO Image
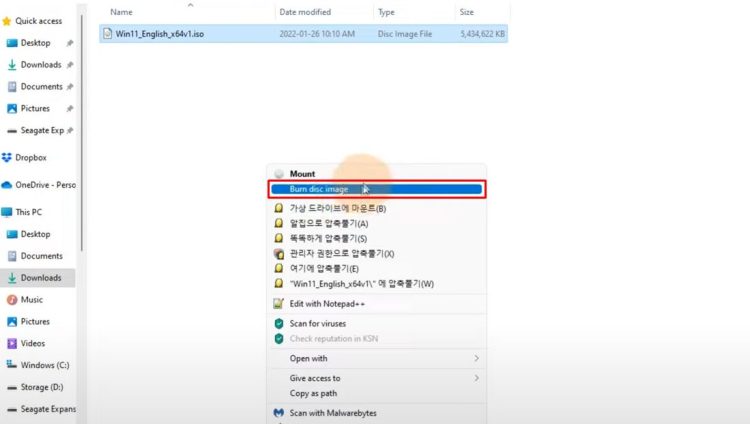
Now right click on the ISO file. Maybe the menu looks different than yours because I have Windows 11 already. I have to click Show more options.
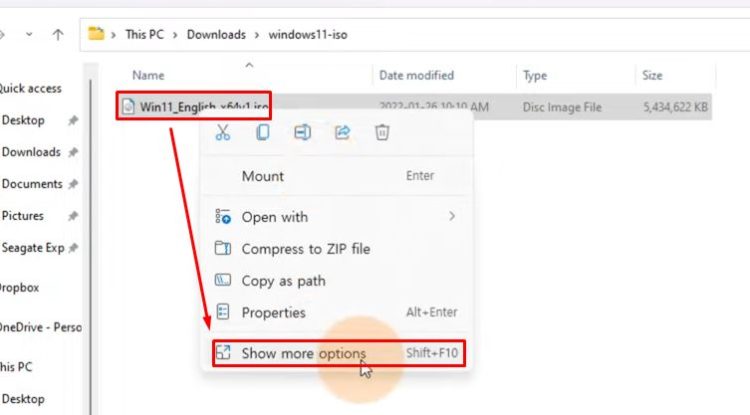
Now the second option from the top is Burn disk image. Click that to burn your ISO image to a DVD.
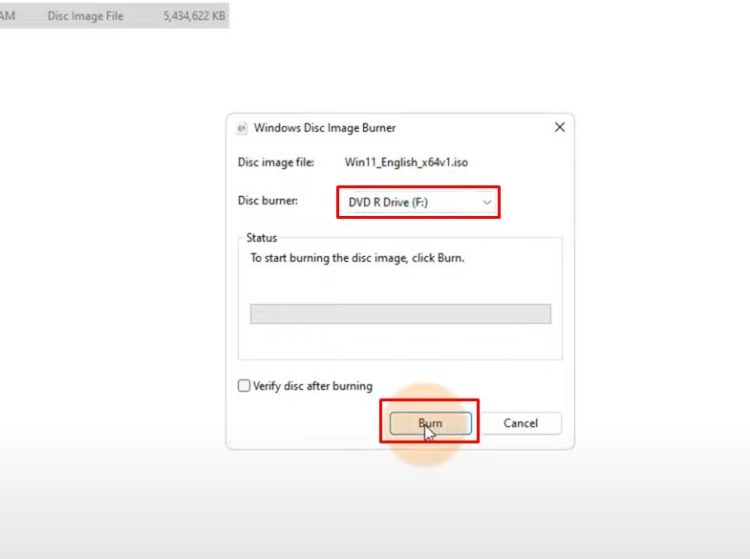
Alright, this image file is correct and now we have to choose the drive. I have to put a writable DVD disk inside it and then I can just click Burn to start burning.
Tips:
- Make sure your DVD drive is set as the default burning device.
- If you encounter any errors during the burning process, try cleaning your DVD drive or using a different DVD disk.
Checking the Burned DVD
BIOS Settings for a Bootable DVD

Safety Measures
Troubleshooting Tips

- Insufficient Disk Space. Ensure you have enough space on your hard drive to download and store the ISO file.
- DVD Compatibility. Use a compatible DVD-R or DVD-RW disk. Some older DVD drives may not support certain types of writable DVDs.
- Burning Errors. If you encounter errors during the burning process, try using different burning software such as ImgBurn or CDBurnerXP.
- Slow Burn Speeds. If the burning process is slow, try reducing the burn speed in the burn settings for a more reliable result.
- Verification. After burning, you can verify the integrity of the DVD by attempting to boot from it or checking its contents in Windows Explorer.
Conclusion
That was how to burn an ISO image to a DVD drive.
Once the bootable DVD is created, you can use it to install Windows 11 on any compatible computer. Simply insert the DVD into the computer’s DVD drive, restart the computer, and follow the on-screen instructions to install Windows 11.
If you have any questions or problems, leave comments. Remember to always download ISO images from official sources and be cautious when burning DVDs to avoid any potential risks or data loss.