
In the world of operating systems, Linux occupies a special place, offering users an alternative to commercial solutions. Among the many Linux distributions, Linux Mint stands out – a system that has proven itself to be an accessible, yet powerful platform for both beginners and experienced users. Linux Mint appeared as a response to the growing demand for a less resource-intensive system, but at the same time complete and easy to use. This is an open source platform that, from the first steps, will offer the user everything necessary for comfortable work. Today we will talk a little about the system itself, and then we will move on to creating and installing Linux Mint from a bootable USB drive.
Advantages and Disadvantages of Linux Mint
There are several reasons to look towards Linux. For example, your computer is outdated and the operating system has become slow, and due to its low system requirements, Linux seems like a good alternative. Perhaps you just don’t want to pay for a license – users are not limited by licensing agreements, as is the case with commercial operating systems. In addition, Linux Mint is very flexible – you will have full access to system settings, and you can adapt the workspace to your personal preferences.
Benefits of Linux Mint
- Easy to install and use
The system is equipped with everything you need to start working immediately after installation: office applications, browsers, utilities for working with media. - Safety
Like most Linux distributions, Mint comes with powerful data and system security features. - Large community
There are many forums and resources where you can find answers to your questions or get help.
Disadvantages of Linux Mint
- Limitations in games and some specialized software
Despite the community’s efforts, Linux still lags behind Windows in supporting some games and specialized applications. - Periodic need for manual settings
Some hardware or specific software may require manual configuration for updates and optimal performance. After switching from another operating system, using Linux Mint may seem unusual to you at first, but over time you will notice the stability, security and ease of use, despite minor shortcomings (which are inherent in any product).
Which version should I choose?
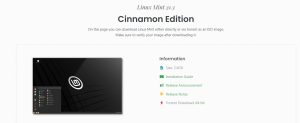
The system is available in several versions, differing in their desktops: Cinnamon, MATE and Xfce.
Cinnamon is the flagship edition of Linux Mint. It includes a modern, innovative and fully functional desktop. Animated transitions and dynamic effects on the desktop are performed at the highest level – the aesthetic appeal of the interface deserves special attention. However, some users claim that Cinnamon can be a bit resource-intensive compared to its peers.
MATE – considered more stable because it is based on the GNOME 2 shell, which preceded Cinnamon. Additionally, MATE may perform better on older hardware due to its more modest system resource requirements.
Xfce – for systems with limited resources, without losing functionality. It lacks some components that you get in the other two options. If you want your desktop environment to be out of the way and for applications to be accessibleundefined more system resources, then Xfce will be a great choice.
Options when installing Linux Mint from a USB drive
Let’s see what exactly a bootable USB flash drive with Linux Mint allows you to do:
• Of course, you can initially install Linux Mint on your PC. Installation requires a preliminary launch of the system via the “Start Linux Mint” option.
• It is possible to evaluate the functionality of Linux Mint without the need to completely install the system on your computer, as well as run Linux Mint on a computer that does not belong to you
• It is possible to load the distribution in a specialized mode, which increases its compatibility with various computer configurations.
• In the boot menu, Linux Mint has tools that allow you to restore your computer to normal operation using bootable media.
• Linux Mint includes tools for assessing the state of your computer’s RAM.
• Audit drives for errors: Built-in utilities allow you to check the integrity of the file system of hard drives.
• Implement a special methodundefined installations for equipment manufacturers. OEM installation option, which is relevant for manufacturers and system assemblers. Additionally, you can use the Linux Mint boot menu to identify connected devices.
Making a Bootable USB with Linux Mint
There is specialized software to create such a bootable USB. Using such programs, you can burn a USB drive with Linux Mint using a computer with Windows, macOS, Linux or another operating system.
One of the popular and reliable programs for creating a bootable USB with Linux Mint is Rufus. This is a free tool for Windows that is easy to use and allows you to seamlessly burn ISO images to flash drives, making them bootable.
Also quite well known is balena Etcher, which is available for Windows, macOS, and Linux, has a pleasant user interface and also makes it easy to create a bootable USB drive. We’ll show you how to burn Linux Mint using these two options.
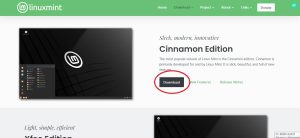
To download it, go to the site using this link, select the desired version and localization and download the ISO file
Creating a USB with Rufus
Go to the official Rufus website and download the latest version of the program. This can be a standard or portable version
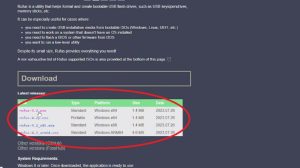
Connect your USB drive. In the “Device” field, select it from the list. In the “Boot selection” field, select the Linux Mint ISO file in the pop-up window.
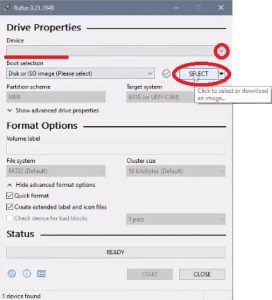
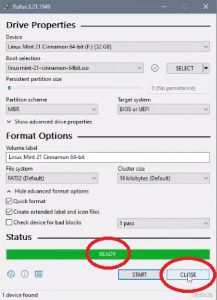
– The “Volume label” field allows you to change the name of the USB drive. Please note that the file system remains FAT32 Click “Start” button

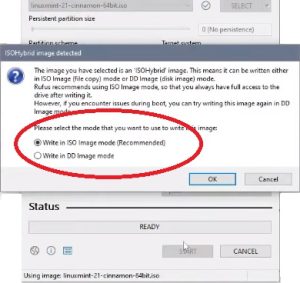
The program gives a choice for recording in 2 modes: “ISO-mode” and “DD mode”. Select the first value.
At this step, the program warns you that the drive will be formatted and the data will be permanently deleted
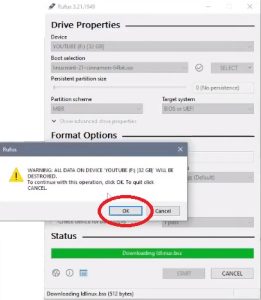
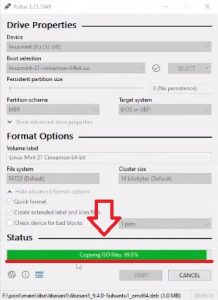
The program has started working. It takes a few minutes.
When the recording process is completed, you will see the message “READY” and you can click “CLOSE” to close the program
USB Flash drive with Linux Mint is ready.
Be sure to remove it safely.
Creating a USB with Etcher
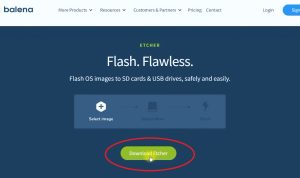
Go to the official Balena Etcher website and download the latest version of the program
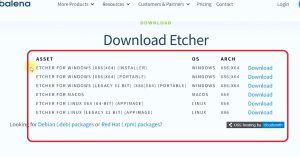
When downloading, there are several versions to choose from for different platforms, select the one you need and click “Download”. At this point, connect your USB drive.
Once Etcher has loaded, launch it. Select the “Flash from file” command

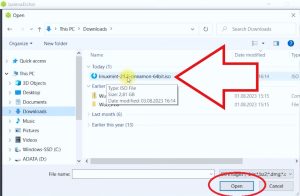
– Select the linux mint iso file from the pop-up list
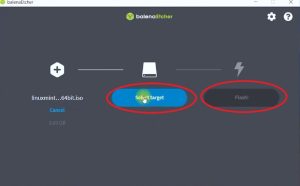
– In the “Select Target” field, select your USB drive and click the “Flash” button
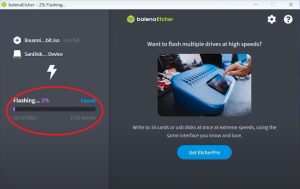
– The program started working
– When finished, you will see the message “Flash Completed!”
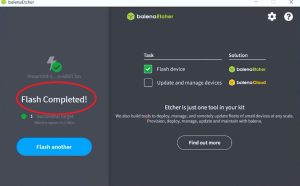
Your USB to Linux Mint is ready.
Remove the USB using a safe method.
Installation from USB
Insert your flash drive (if you removed it) into a free USB port and restart your computer.
When the initial POST (Power-On Self-Test) screen appears, press the key to enter the BIOS/UEFI setup menu. Typically this is the Del, F2, F10, F12, Esc or other key depending on the motherboard manufacturer.
In the BIOS/UEFI menu, go to the Boot Menu or Boot Order. Select your USB device as the primary boot device. Settings may vary, but you’re looking for an option that allows you to change the boot order of devices. After installing the USB drive as the first one in the boot list, save the changes and exit the BIOS/UEFI, this is usually done by selecting “Save & Exit” or pressing the F10 key.
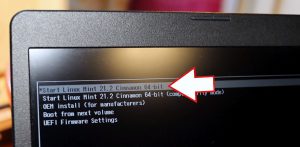
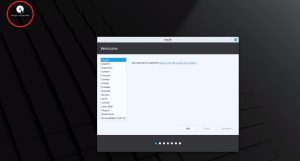
The computer should automatically restart and begin the boot process from your USB drive. After this, if everything is done correctly, the Linux Mint installer menu will appear on the screen.
 \
\
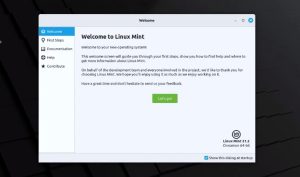
The next step is a greeting from Linux Mint. Before you is a screen offering to “try on” the system without installation or proceed directly to installation.
Select “Install Linux Mint” and dive into the process.
Follow the installer’s instructions. You’ll select the system language, keyboard layout, and possibly configure other, more subtle settings. You will be prompted to partition the disks. If you don’t want to go into details, select “Install side by side” and let the installer deal with the partitions on its own. Wait until the files are copied. Dependencies, kernel, modules – all this will be moved to solid state media.
After this, the installer will ask you to restart your computer to ensure the operation is successful.
Now that the system is installed, you will see the Linux Mint desktop.